Easy Sauerkraut Recipe (Just 2 Ingredients!)
")
This sauerkraut recipe Is simple, inexpensive, delicious, full of health benefits, and made from just two ingredients plus a little time to let it ferment.
This homemade sauerkraut recipe is an easy start to introduce you to the world of at-home fermentation. If this is your first fermenting at home, this is a good way to dip your toes into the process to see what itâs all about.
It makes enough to fill about ½ of a large mason jar and just takes 3-4 days to ferment.
When you make this recipe, youâll get to enjoy the tasty sauerkraut recipe at the end and reap the health benefits of probiotics in this naturally fermented food. Plus, youâll get the satisfaction of making your own super-charged, gut-friendly sauerkraut at home. Win-win-win.
What is Sauerkraut?
Sauerkraut is a probiotic-rich superfood that is made from cabbage through the process of fermentation. Itâs totally vegan- and flexitarian-friendly.
Lactic acid bacteria (Lactobacillus bacteria, to be exact) feed off the cabbage leavesâ sugars. This sauerkraut fermentation process results in a delicious, tangy flavor.
How is Sauerkraut Fermented?
Fermenting cabbage, known as lacto-fermentation, relies on naturally occurring Lactobacillus bacteria and salt to create an anaerobic environment for fermentation.
In short, there is good healthy natural bacteria on the fresh cabbage, and when combined with salt and left to sit, you can easily make your own homemade sauerkraut.
Unlike canned sauerkraut, which often uses vinegar and lacks health benefits, real sauerkraut is naturally fermented and found in the refrigerated section of stores.
Why is Sauerkraut Fermented?
Sauerkraut is fermented because this natural process preserves food.
In fact, it has been used for thousands of years and was the primary way of preserving food before the refrigerator came along.
The most significant benefit of eating fermented foods like sauerkraut is that the fermentation process creates a multitude of gut-friendly probiotics (beneficial bacteria).
Health Benefits of Sauerkraut
There are so many incredible health benefits of sauerkraut and other fermented vegetables. The primary health boost you get from sauerkraut is the large quantity of probiotics, otherwise known as âgood bacteria.â
Benefits of the natural probiotics in sauerkraut include:
- Immune system boost
- Gut healing
- Glowing skin
- High in micronutrients, vitamins, and minerals
Sauerkraut is vegan, dairy-free, and gluten-free, packed with dietary fiber. Itâs also high in vitamins like vitamin C, Vitamin K, and minerals such as phosphorus, calcium, and potassium.
What You Need to Make Sauerkraut
Here is the best part of this recipeâyou only need 2 ingredients for this recipe:
Ingredients:
- Fresh cabbage (green, red, purple, Napa, or any cabbage works)
- Kosher salt
Optional Additions:
- Spices: caraway, black pepper, hot peppers, garlic
Equipment:
- Large glass container
- Sharp knife or mandoline
- Cutting board
- A fermentation weight and/or lid made to let air out are also helpful.
Now, youâre ready to add this savory ingredient to sandwiches, potato salads, sausage cookouts, deviled eggs, and more.
Tips for Making Sauerkraut
Although this recipe is seriously the easiest to make, I have a few tips to make the best sauerkraut.
Use Fresh Cabbage
This sounds like a no-brainer, but make sure to always use fresh cabbage, whether red or green, for this recipe. I love to pick up a cabbage from the farmerâs market for this recipe to get the complete farm-to-table feel.
Pick a High-Quality Salt
Now is not the time to use cheap table salt. Try using a mineral-rich kosher salt or pink Himalayan salt for this recipe. Your taste buds will thank you for choosing quality.
Use Enough Water
The cabbage must be fully submerged under the pickling brine for the fermentation process to continue. This allows the Lactobacillus bacteria to do their work and protects the sauerkraut from molding.
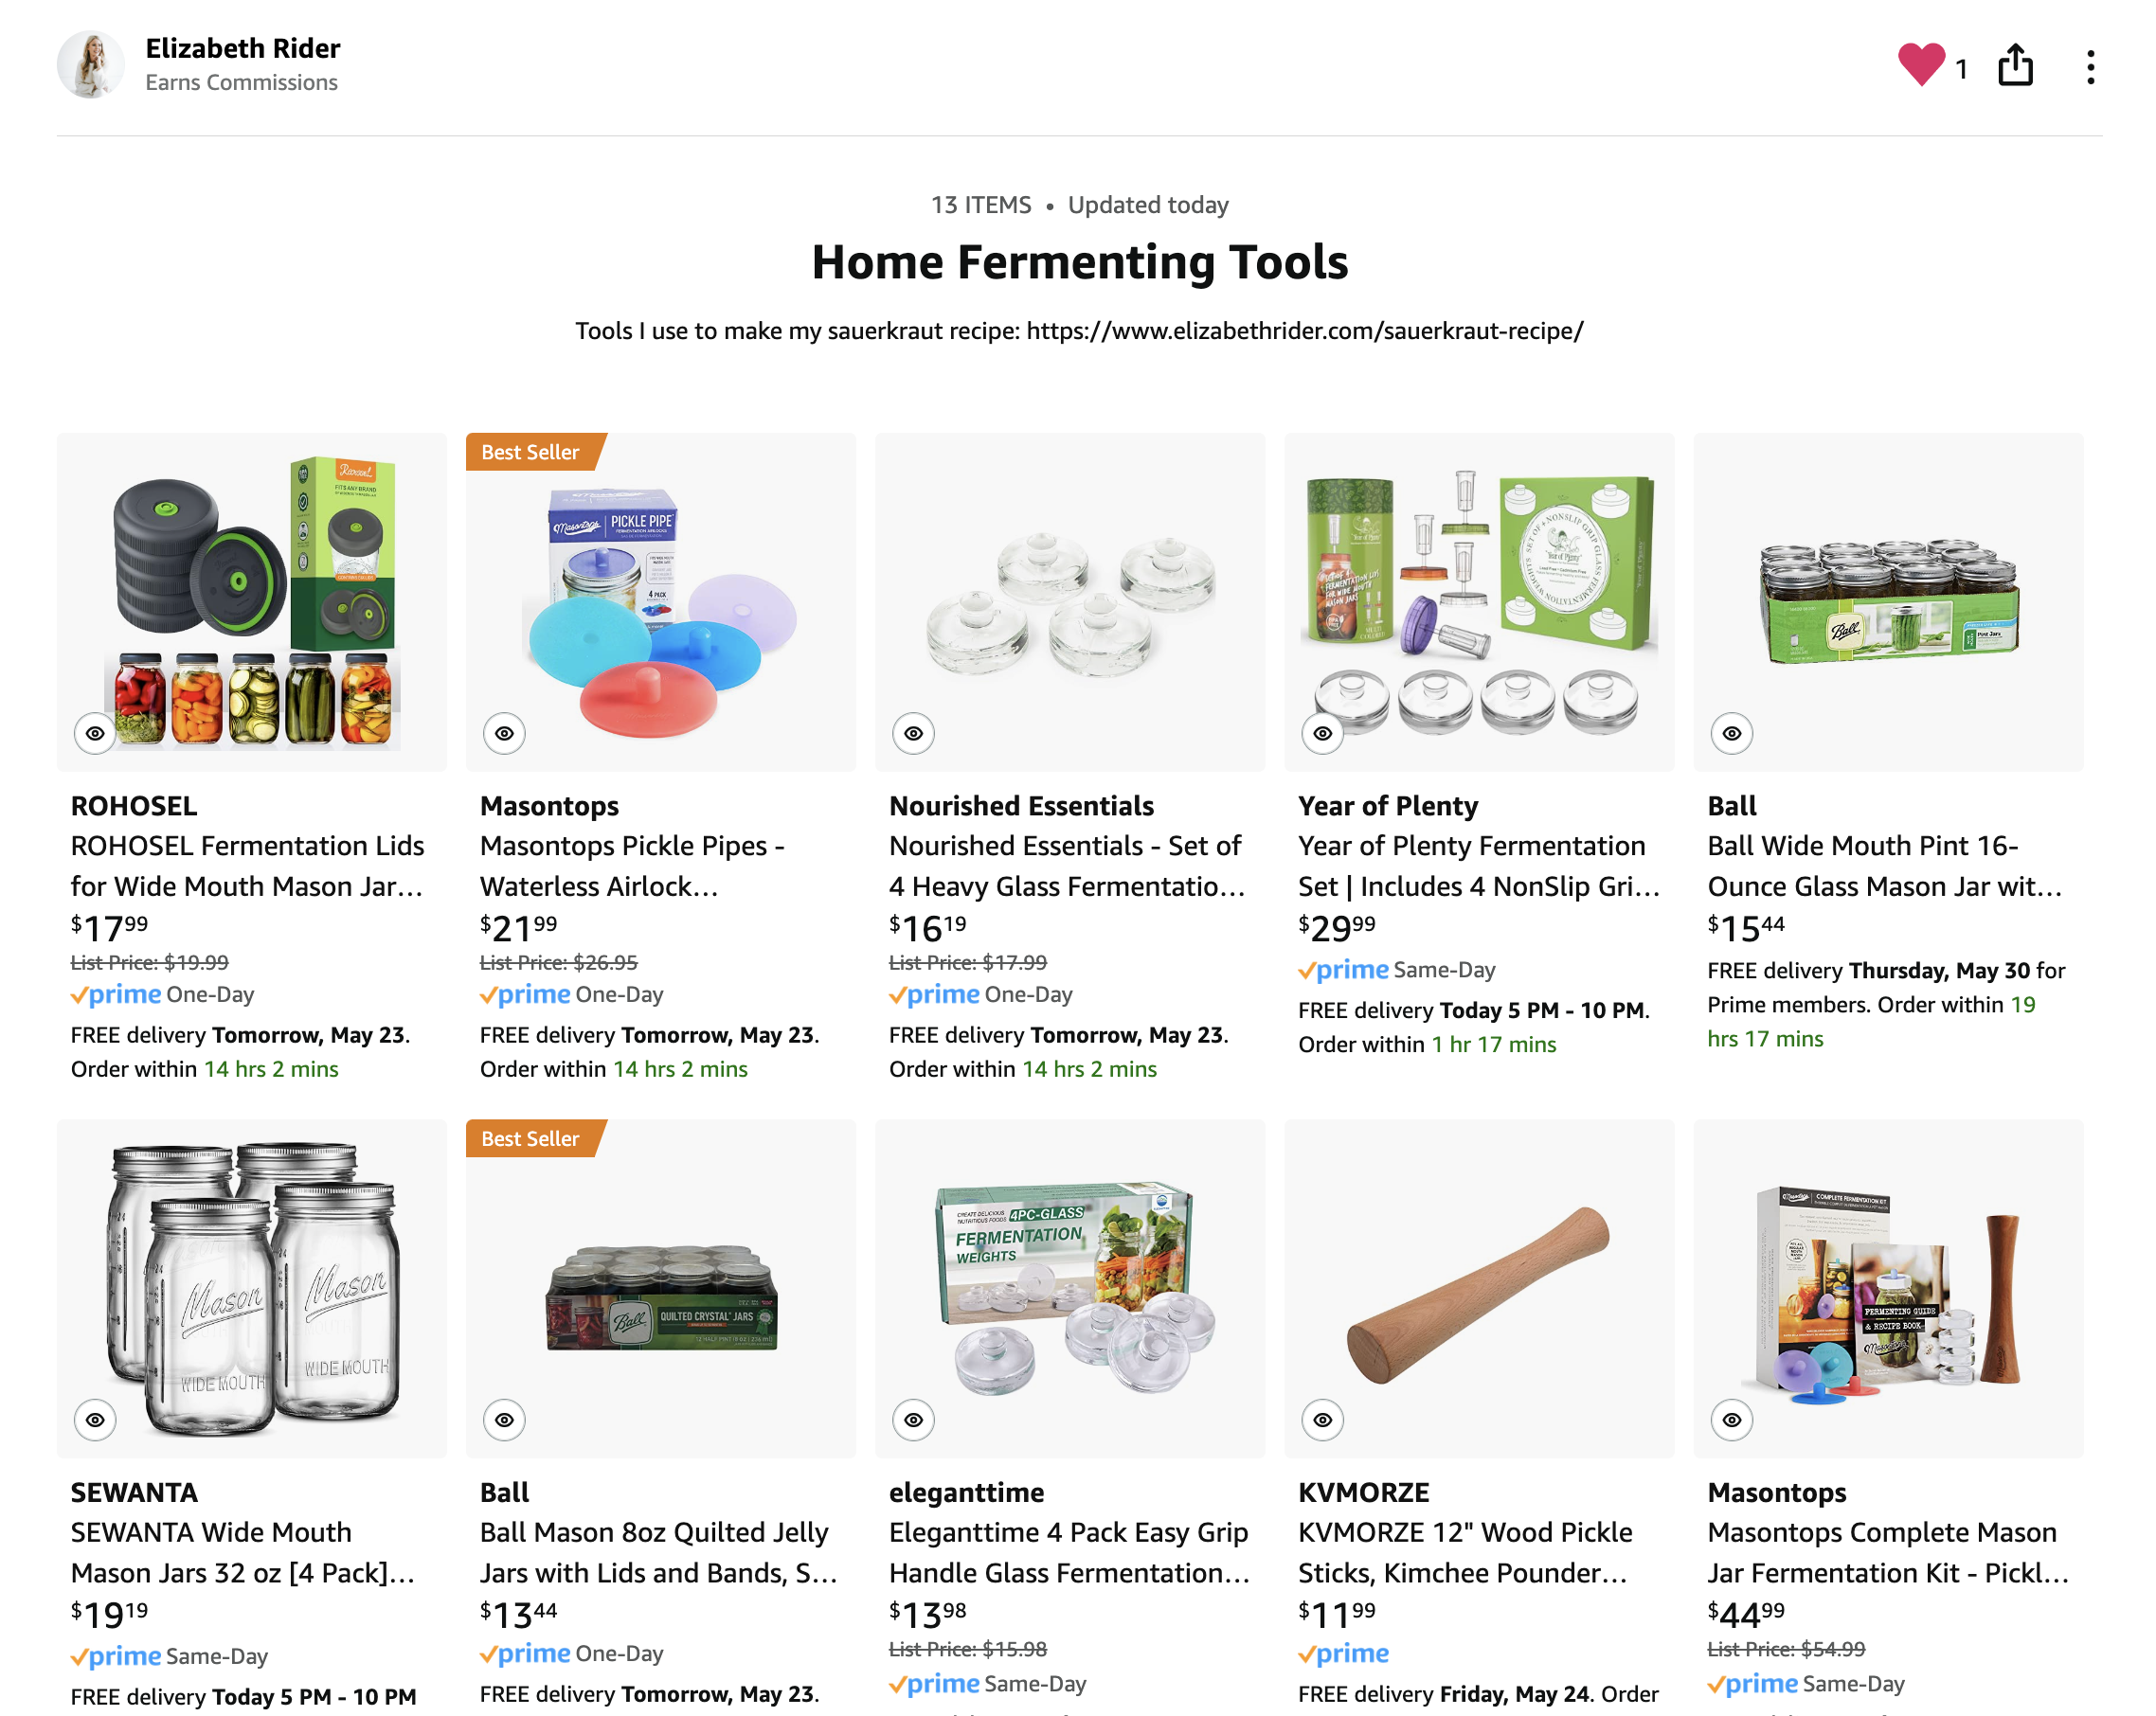
If the cabbage is not staying submerged, try using a jar on top of the fermenting jar as a weight or investing in fermenting weights (you can find these on Amazon).
How to Store Homemade Sauerkraut
Sauerkraut is a breeze to make. Prep included; it takes about 10 minutes in total. Once fully fermented, it lasts about 6 months if kept in an airtight container in the refrigerator.
I always store my homemade sauerkraut in a glass jar. I prefer a quart jar, but you can use larger or smaller jars depending on how much youâd like to make.
Homemade Sauerkraut Recipe Notes:
- Fermentation time. In general, the smaller the batch, the shorter time it will take to ferment. The larger the batch, the longer it will take to ferment. Weâre starting off here with about 1/2 of a head of a small to medium cabbage for the first batch. Fermenting should take about 3-4 days at room temperature.
- Flavoring. This is quite a basic recipe: just cabbage and kosher salt. If you want a traditional flavor with a little more kick, you can add 1/2 to one teaspoon of caraway seeds when you add the salt if desired. The beauty of making your own sauerkraut is that you can even add other spices and other veggies, too. You have complete control of what is going in your recipe.
- Ingredients. Look for organic cabbage, if possible, to keep the pesticides out of your homemade sauerkraut. I use the brand Real Salt sea salt. If the organic cabbage at your store is pricey, ask the produce staff to cut it in half for youâI do this almost every time I buy cabbage. Cabbage is dense and shredding creates a LOT of food, so you only need about 2 pounds to make this.
- Appearance. You can choose any cabbage youâd like, or mix different varieties for a really pretty sauerkraut. One part purple cabbage, one part green cabbage, and one part napa cabbage make for gorgeous color and texture in your sauerkraut. The good news is that it all tastes the same).
- Kids in the kitchen. This is a great âscience experimentâ to do with your kids every few weeks. Store it in the fridge and let them help you pick recipes and dishes that will complement your sauerkraut.
- Avoid these mistakes. One thing: do not buy pre-shredded or sliced cabbageâyou need the lactobacillus bacteria living on the inner leaves. Most pre-shredded cabbage has been washed and/or irradiated. All store-bought produce in the US is irradiated (even organic), but only the outer leaves will be hit on a full head of cabbage. This is another reason to shop at your local farmersâ market.
I know I gave you a lot of notes here, but this is actually really simple and will take you less than 10 minutes to pull a batch of it together once you get the hang of it.
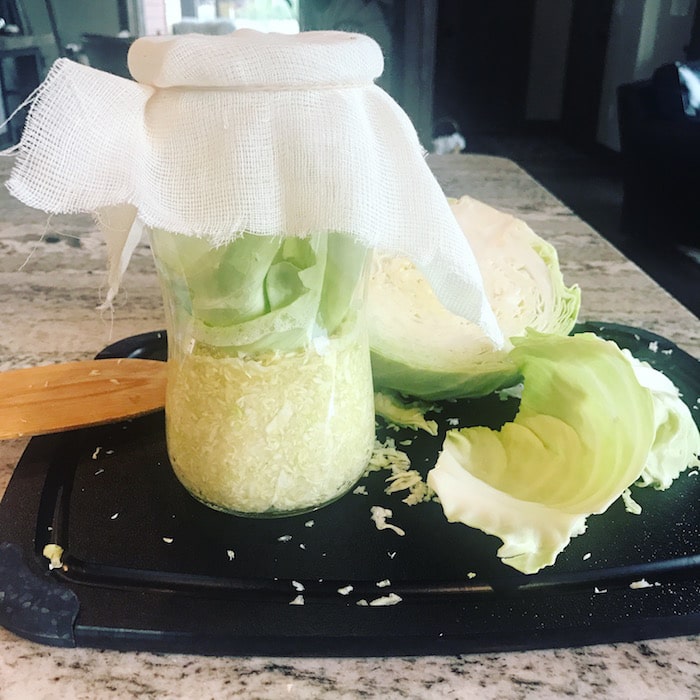
Hereâs what my last batch looked like while it was fermenting. I used a box grater to shred the cabbage:
How to Make the Best Sauerkraut
You can print this recipe from the recipe card below.
Ingredients:
- 1/2 of a small to medium head of cabbage
- 1 1/2 tablespoons sea salt
Youâll need a clean cutting board, knife or box grater, mixing bowl, a mason jar, a lid that allows air to escape (or you can use a cheesecloth or other cloth), and lid for your jar.
STEP 1: CLEAN
Wash your Mason jar, tools, and hands thoroughly with natural soap and hot water. When fermenting, you want to give the healthy bacteria a clean environment to thrive in to prevent mold.
After washing it with soap, I usually pour boiling water into and over the Mason jar to kill off any potential lingering bacteria.
STEP 2: PREPARE
Cut your cabbage into quarters, leaving the root end attached. An attached root end makes the cabbage easier to chop or shred. Discard the outermost layers, then save a few of the next layers to weigh the cabbage down in the jar.
Do not wash the cabbageâyouâre relying on the natural healthy bacteria that live on the leaves for the fermentation process.
STEP 3: SHRED
Choose your preferred texture. Thinly slice each cabbage quarter into ribbons, or shred it on a box grater for finer sauerkraut. As with all components, if you use the box grater, make sure itâs clean
STEP 4: MIX & MASSAGE
- Add the shredded cabbage to a large mixing bowl and cover with salt. Using clean hands, massage the salt into the cabbage for about 30 seconds.
- Let it sit for about 3-5 minutes to allow the salt to draw more liquid from the cabbage. Massage again for another 30 seconds.
- This liquid is your fermenting brine, and there should be plenty of it.
I often use a small to medium cabbage with 1.5 tablespoons of Real Salt. However, if you want to calculate how much salt to use in your homemade sauerkraut (science is fun!), here is how to properly calculate your salt ratio:
To calculate the amount of salt to use when making sauerkraut, follow these simple steps:
- Weigh the Cabbage: Start by weighing your cabbage after youâve shredded it. This can be done using a kitchen scale.
- Calculate Salt Amount: The ideal salt concentration for fermenting sauerkraut is about 2-2.5% of the weight of the cabbage. This percentage ensures proper fermentation and prevents spoilage.
- Apply the Formula: Use the following formula to determine the exact amount of salt needed:
Weight of cabbage (in grams)Ã0.02=Salt needed (in grams)Weight of cabbage (in grams)Ã0.02=Salt needed (in grams)
Example Calculation:
- If you have 1000 grams (1 kg) of shredded cabbage:
- 1000âgramsÃ0.02=20âgrams of salt1000gramsÃ0.02=20grams of salt
- So, you would need 20 grams of salt for 1000 grams (1 kg) of cabbage.
STEP 5: FILL THE JAR
- Add the shredded cabbage and all of the liquid/brine to your Mason jar. Use the back of a clean wooden spoon to tamp down the cabbage. It should be fully submerged in the brining liquid.
- There shouldnât be a lot of excess liquid, but the top of the cabbage should be fully underneath the brine. It can take 4-5 hours for enough juice to extract out of the cabbage and cover it.
- You can allow that process to happen on its own. Just be sure to check back in on the shredded cabbage 4-5 hours after putting it in the jar to ensure that it is covered.
- Keep using the back of your wooden spoon to push it down if needed. Place a few of the reserved cabbage leaves on top of the shredded cabbage to weigh it down.
- If it hasnât submerged after 4-5 hours: thatâs ok; give it an hour more to sit. If itâs not submerged in an hour or so, add additional brine 1 tablespoon at a time.
- To make the additional brine, combine 1/4 cup of water with 1/4 teaspoon sea salt. You can add a little to bring the brine just above the cabbage. This isnât typically needed, but now you have the recipe just in case.
STEP 6: COVER
- Cover the jar with a lid made to let air escape or a cheesecloth use a rubber band or kitchen twine to secure it. This allows airflow into the jar and prevents dust or bugs from landing in it.
- You make need to “burp” your sauerkraut. “Burping” homemade ferments refers to releasing the built-up gas (usually carbon dioxide) that accumulates during the fermentation process. As the lactic acid bacteria break down the sugars in the vegetables, they produce carbon dioxide as a byproduct, which can create pressure inside a sealed fermentation container.
- If the gas is not released, the pressure can build up and potentially cause the container to burst, so use cheesecloth or a lid like this to let carbon dioxide escape.
STEP 7: FERMENT
Now it is fermentation time! Let the sauerkraut sit out at room temperature for 3-7 days. The longer it sits, the more fermented and tangy it will get.
Keep it at room temperature out of direct sunlight as the direct sunlight might overheat it. I let mine sit in the pantry or the back of the counter. Within about 24 hours, youâll start to see tiny bubbles forming. Thatâs the lacto-fermentation in action.
STEP 8: REFRIGERATE
Once the sauerkraut is fermented to your liking, cover with a tight-fitting lid and store in the refrigerator for up to 2 weeks.
Homemade Sauerkraut Recipe Q&A:
- What can I add to sauerkraut? Garlic, dill, celery root, lemon peel, fennel, ginger, beets, cucumbers, onions.
- Why is sauerkraut good for you? It’s rich in probiotics, vitamins, and minerals.
- How do you make sauerkraut taste better? Add flavors or shorten or lengthen fermentation time. Homemade sauerkraut is a bit of an art and a science. Different factors, such as the ambient temperature in your house and the individual head of cabbage, will determine how long it takes to ferment.
- What spices are good in sauerkraut? Dill, caraway seeds, juniper berries, celery seeds, fennel.
- Do you rinse cabbage before turning it into sauerkraut? No, I don’t rinse it. You want the natural bacteria in the cabbage to remain. Discard the outermost leaves but there’s no need to wash it.
- How will I know itâs done? It will start to create small bubbles (that’s the fermenting!) after a few days. It will taste tangy and delicious when it’s ready, about 4-7 days later.
- What if there arenât any bubbles or itâs not tangy? Check salt levels, cabbage quality, and room temperature.
- What if I see mold? Discard the sauerkraut; it didnât ferment properly.
- What to do with leftover brine? Drink it or use it in salad dressingâit’s full of gut-friendly probiotics!
Description
This 2-ingredient sauerkraut recipe is one of our favorites. Not only is homemade sauerkraut delicious, but it’s also healthy and saves you money too. Feel free to add 1/2 teaspoon of caraway seeds to the cabbage mix to add a traditional flavor to your sauerkraut. Enjoy!
-
Prepare the Cabbage:
- Remove the outer leaves of the cabbage and discard. Remove one more and set one leaf aside for later use.
- Cut the cabbage into quarters and remove the core.
- Thinly slice the cabbage using a sharp knife or mandoline. The thinner the slices, the quicker the fermentation process. If you prefer the shredded texture, you can also shred the cabbage on a box grater.
-
Salting the Cabbage:
- Place the sliced cabbage in a large mixing bowl.
- Sprinkle the salt over the cabbage.
- Using clean hands, massage the salt into the cabbage. This helps to draw out the water from the cabbage (it creates it’s own brine) and starts the fermentation process. Massage for about 5-10 minutes until the cabbage is wilted and releases a significant amount of liquid.
-
Packing the Cabbage:
- Transfer the salted cabbage and its liquid into a clean jar or fermentation crock. I use a mason jar
- Press the cabbage down firmly using your fist or a tamper to remove air pockets and to ensure the cabbage is submerged in its own brine.
- Place the reserved cabbage leaf over the top to help keep the shredded cabbage submerged. This is optional but I find it helpful.
-
Weighing Down the Cabbage:
- Use a fermentation weight (or a small, clean container filled with water or something heavy) to weigh down the cabbage, keeping it submerged under the brine. Air in the cabbage can cause mold, so it’s important that it’s completely submerged in its brine.
- Cover the jar with a clean cloth or a lid set loosely on top to allow gases to escape during fermentation. Or, use a jar lid designed to release air.
-
Fermentation:
- Store the jar at room temperature, away from direct sunlight, for 1 to 4 weeks. The ideal temperature is around 65-75°F (18-24°C).
- Check the sauerkraut daily to ensure the cabbage remains submerged. If needed, press it down again to release more liquid.
- Taste the sauerkraut after the first week. When it reaches your desired level of tanginess, itâs ready.
-
Storing:
- Once the sauerkraut is ready, remove the weight and the top cabbage leaf.
- Transfer the sauerkraut to smaller jars, if desired, and store it in the refrigerator covered with a lid. Properly stored, it can last for several months.
Notes
- Ensure all equipment is very clean to prevent unwanted bacteria from interfering with the fermentation process. I generally pour boiling water over everything to make sure there’s no unwanted bacteria.
- Some people say if you see any scum or mold on the surface, simply skim it off and the sauerkraut beneath should be fine as long as it remains submerged in brine. I prefer to throw it away and start over if I see mold (I’ve only had to do that once!).
- Experiment with adding different spices or other vegetables like carrots or beets for variety.
Other Recipes Youâll Love