
How to Bake Chicken Breasts

I’ve been baking chicken breasts in the oven for 20 years and have tried every way, and I can tell you that this is the best way to bake chicken breasts in the oven. Period.
Chicken breasts baked in the oven are one of my favorite quick and easy dinner meals. They’re full of healthy lean protein, simple to make, great for meal prep, and super versatile, too.
But there are a few tricks to making sure that when cooking chicken breasts in the oven, they turn out dry and unappealing. We want juicy chicken breasts to slice up for salads, sandwiches, lunches and dinners.
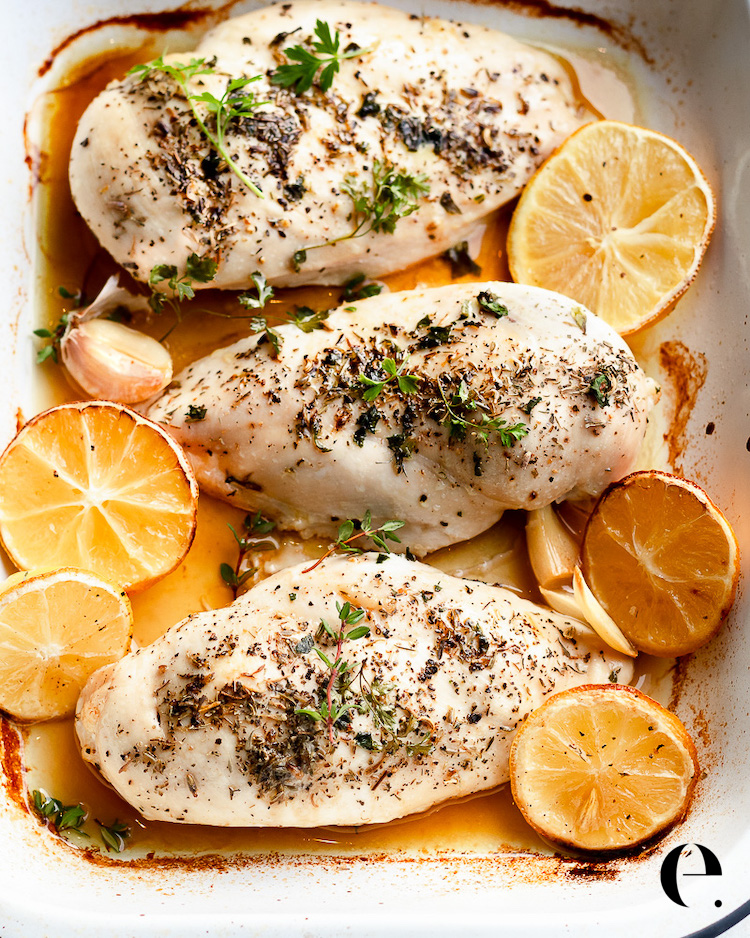
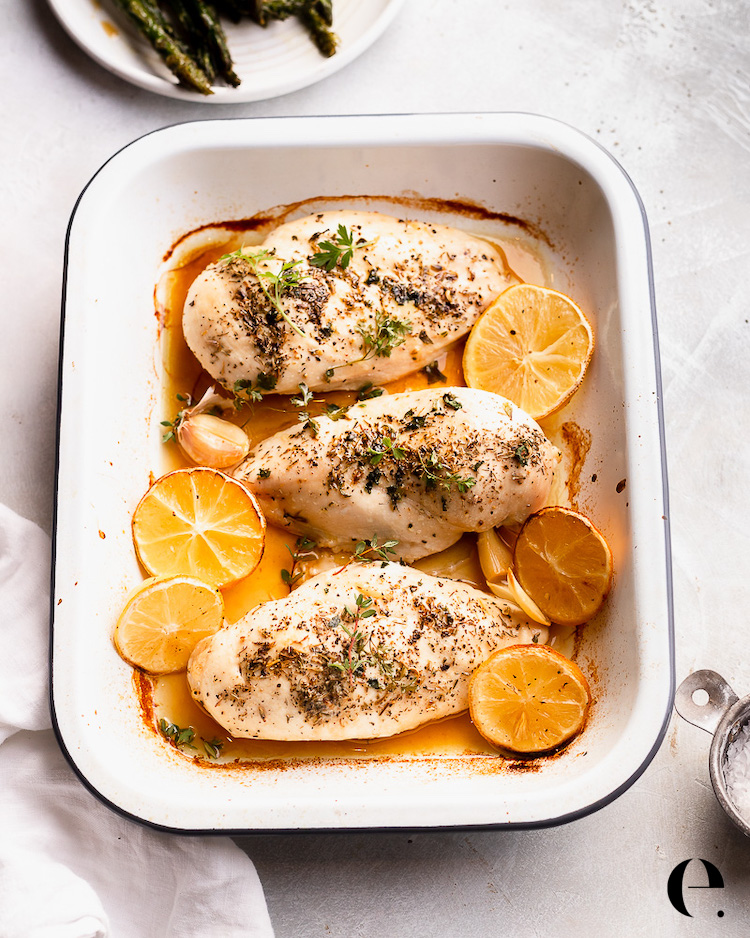
I often simply season baked chicken breasts with salt & pepper to use in multiple dishes during the week (like cilantro corn pasta salad, a cobb salad, chicken pesto pasta, etc). Sometimes I dress them up with fresh lemon & herbs before baking (like the photos on this page) to serve solo with potatoes.
Here are my simple, never-fail steps to get perfect juicy, tender, flavorful baked chicken breasts every time.
Baked Chicken Breasts Recipe
This recipe easily scales. A serving of chicken is generally about 4 ounces (115g), so 1 pound (455g) of chicken breasts is typically about 4 servings.
Ingredients:
- 1 pound boneless, skinless chicken breasts (that often about 2 chicken breasts)
- Extra virgin olive oil spray or extra virgin olive oil (or your favorite cooking oil; butter burns at high temperatures so I don’t use it to bake chicken breasts, but you could use ghee)
- Salt and freshly ground black pepper
- Optional: Lemon slices and/or garlic powder or your favorite seasoning
How to Bake Chicken Breasts
- Prepare the pan: I prefer to line a sheet pan with parchment paper for easy clean up. You can use just about any pan that has raised sides to bake chicken breasts.
- Prepare the chicken: Remove the chicken breasts from the container. If there is any liquid in the container, make sure to pat them dry with a paper towel. Wet meat steams instead of roasting, which doesn’t yield the best texture.
- Butterfly the chicken breasts open if they’re thicker than 1-inch:
- Place the chicken breast on a cutting board: Position the chicken breast flat-side down, with the thicker side facing you. Use a sharp chef’s knife for precise, easy cuts.
- Hold the chicken breast steady: Use your non-dominant hand to gently press down flat on top of the chicken to keep it steady.
- Make a horizontal cut: Starting at the thicker side of the chicken breast, carefully slice horizontally through the middle, stopping just before you cut all the way through for a large cutlet, or go all the way through for 2 smaller cutlets.
- Optional: Pound to an even thickness: If needed, place the butterflied breast between plastic wrap or parchment paper and gently pound it with a meat mallet (or rolling pin or the back of a heavy saute pan) to even out the thickness.
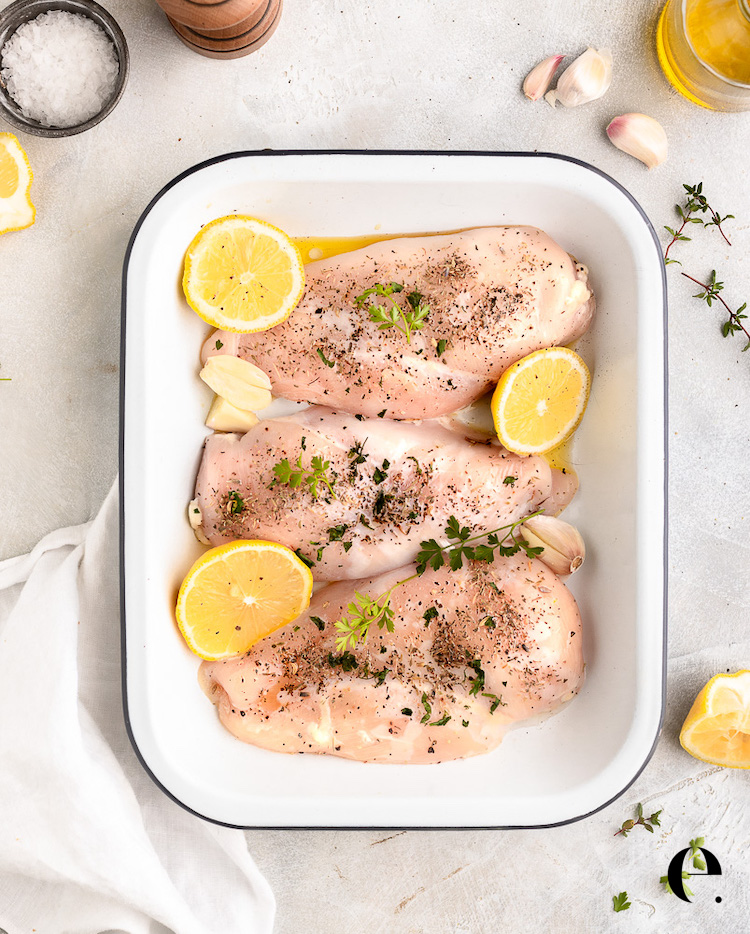
- Season: Coat the entire breast in a thin layer of extra virgin olive oil (or your preferred cooking oil), and sprinkle with salt and pepper. You can also add a sprinkle of garlic powder and a few lemon slices, or your favorite seasoning.
- Butterfly the chicken breasts open if they’re thicker than 1-inch:
- Bake at 375°F (190°C) until the internal temperature is 165°F (74°C), which generally takes 18-25 minutes, depending on your oven.
- How long should you cook chicken breast in the oven? 18-25 minutes, or until the internal temperature is 165°F (74°C) on an instant-read thermometer and it’s cooked all the way through.
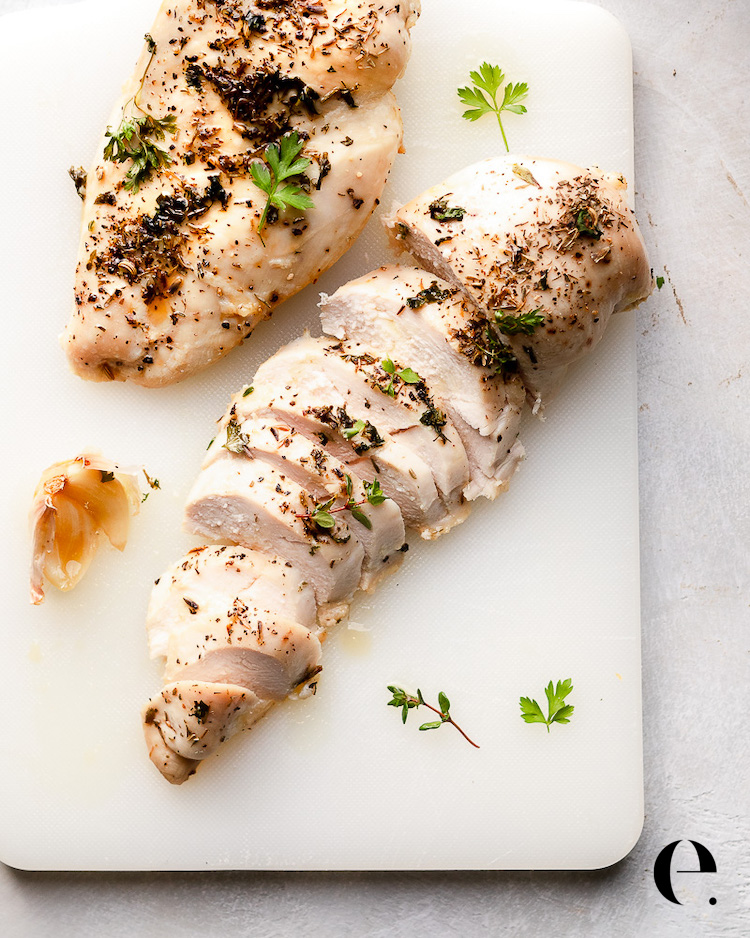
- Rest for 5-10 minutes to allow the juices to settle before slicing or serving.
Choosing Chicken Breasts for Baked Chicken
When choosing chicken, I prefer using organic, air-chilled chicken breasts whenever possible. Air-chilling means the chicken breasts aren’t processed with water, diluting their flavor and making the skin soggy.
The other aspect to consider when picking your chicken breasts is cooking time. The larger the chicken breast, the longer the cooking time will be to get a juicy chicken. An 10- to 12-ounce chicken breast may need 30 minutes to cook, while a 5-ounce one might only need 18 minutes. This is another reason I cut them in half or butterfly them open.
Boneless, Skinless or Skin-On, Bone-In?
I am a fan of both types of chicken: boneless, skinless and skin-on, bone-in. With this recipe, you can use either type for your juicy oven-baked chicken breasts.
In general, bone-in meat is more flavorful (thanks to the fat from the skin), but it also takes longer to cook. In some cases, 20-30 minutes longer.
On the other hand, boneless skinless chicken breasts cook up faster but have no barrier to retain moisture, which is why you need to spray or drizzle them with oil.
The chicken recipe in the printable recipe card below is for boneless, skinless chicken breasts baked in the oven.
Baked Chicken Breast Tips
Once you master this easy technique, youâll be able to quickly cook up chicken to add to your salads or have as a main dish any night of the week.
Here are the essential tips for the best baked chicken breasts:
- Choosing: Use fresh, high-quality chicken breasts. Organic or air-chilled chicken tends to be the best texture once cooked.
- Start with Room Temperature Chicken: Allowing your chicken breasts to sit out for about 15-20 minutes before baking will ensure that they cook more evenly.
- Choosing a Pan: I generally roast chicken on a sheet pan lined with parchment paper for easy clean-up, but any oven-safe pan or dish will work. Use whatever you have.
- Seasoning: Prep your chicken breasts with a small drizzle or spray of healthy fat (extra virgin olive oil, avocado oil, or ghee) and salt & pepper. My go-to for fat is a spray or drizzle with extra virgin olive oil.
- Don’t be afraid of the fat! Oil adds flavor and raises the surface temperature of the chicken in the oven, which allows it to roast properly. The salt and pepper will flavor the chicken as it bakes, so always add it before putting it in the oven.
- Size: If the boneless, skinless chicken breasts are more than an inch thick, butterfly them open for more even cooking. Thick chicken breasts take longer to cook, and the outside usually gets dry before the inside cooks. For the best final texture, butterfly them open (or consider cutting already thinner pieces in half) for more even cooking. If a single breast is larger than 8 ounces (1/2 pound), then cut in half width-wise for 2 thick smaller pieces or butterfly open for two thinner large pieces.
- Oven Temperature: I generally cook chicken breasts at 375°F (190°C). All ovens are different, if they’re taking too long raise the temperature to 400°F (205°C).
- Chicken Cook Time: Don’t undercook (or overcook). Use a meat thermometer to tell you when your chicken breasts have reached an internal temperature of 165°F (74°C). Overcooking can turn a juicy baked chicken breast into a dry or crispy disaster. Chicken is best cooked to temperature, not time. Always cook chicken to a 165°F internal temperature. If you don’t have a thermometer and want to go by time, it will generally take 20 minutes (or anywhere from 18-25 minutes depending on size and your oven). Poultry (e.g. chicken, turkey) should be white/opaque and cooked all the way through.
- Resting: Let chicken rest for at least 5-10 minutes before slicing for the juiciest results. Resting the meat prevents the juices from running out.
Tips & Variations
- Additions: If eating your baked chicken breasts as a main dish, you can add a few sliced & seeded lemons and garlic cloves to the baking dish to add a little more flavor and moisture. Simple garlic lemon chicken breasts are great with a side of potatoes.
- Spices: From there, you can also like to use taco seasoning, Cajun seasoning, Italian seasoning, or anything that sounds good to you. Paprika, oregano, garlic powder, onion powder, chili powder, thyme, and/or rosemary also make wonderful additions to season your chicken recipe.
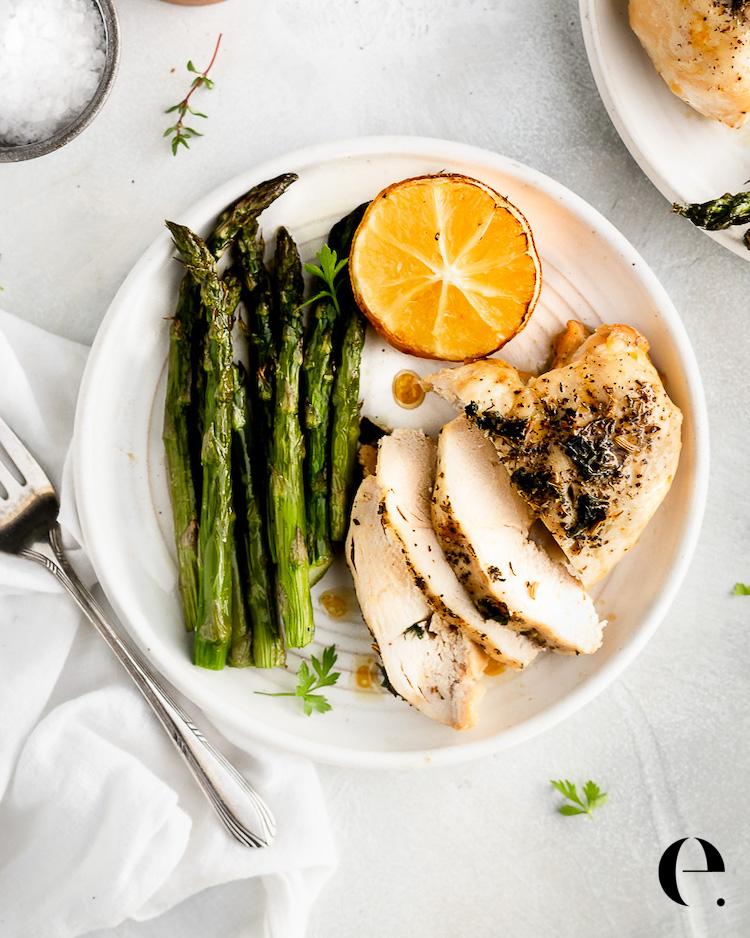
- Serving Suggestions: Serve with rice or baked potatoes, with sweet potatoes or Brussels, on a salad or with your favorite side dish. Oven-baked chicken breasts really are one of the most versatile things you can make when putting together a great meal.
- Air-fryer: Can you cook chicken breasts in an air-fryer? Yep! However, an air-fryer is simply a small convection oven. Convection ovens use a fan to circulate heat, and things cook faster, but the fan can dry out the chicken. Since it is okay to cook chicken anywhere from 375°F to 425°F, you can put chicken breasts in the air fryer at 375°F (equivalent to 400°F), but you’ll want to start checking them for doneness at 12 minutes because they will cook faster.
Storage
How long can chicken be stored in the fridge? Baked chicken can be safely stored in the refrigerator for 3 to 4 days.
Store it in an airtight container or wrap it tightly with aluminum foil or plastic wrap. Be sure to refrigerate it within two hours of cooking to prevent bacteria growth.
Yes, you can freeze cooked chicken, but I don’t find the texture to be great once it’s defrosted. If you do want to freeze it, put it in a freezer-safe bag, get all of the air out, then freeze it up to 3 months.
Other Ways to Cook Chicken Breasts:
Chicken is a delicious source of lean protein. It is also full of vitamin C, calcium, potassium, and vitamin A. With lower cholesterol than many other types of meat, a chicken dinner can be a simple option that the whole family can enjoy.
Description
Here’s the method for perfectly juicy oven baked chicken breasts every time. Easy, flavorful, and tender, this recipe is your go-to for a healthy and delicious dinner. Ready in under 30 minutes!
- Preheat the oven to 375°F (190°C).
- Prep the chicken breasts by removing the tenders if they are still attached to the breasts. If you’re using larger boneless, skinless chicken breasts (over 6-8 ounces), you can also butterfly them open with your knife blade parallel to the cutting board to get two thinner chicken cutlets. Or, if desired, cut large breasts in half width-wise and make two smaller thick pieces. Pat all sides of the chicken dry with a paper towel if there is any liquid in the package.
- Place chicken breasts on a parchment-lined baking sheet or in a large baking dish and drizzle or spray both sides with olive oil. Pprinkle with salt & pepper.Â
- If you like, add lemon slices, fresh garlic cloves, or other herbs on top for extra flavor.
- Bake until the internal temperature of the chicken reaches 165°F (74°C), about 20-25 minutes. (Note that the cooking time will depend on the size and thickness of the chicken breasts. Smaller breasts will take 15-18 minutes.)
- Loosely tent with aluminum foil if you want to keep it warm and let the chicken rest for at least 5-10 minutes. This keeps the juices from running out.
- Store any leftover cooked chicken breasts in the refrigerator in an air-tight container for up to 3 days. You can also freeze it for up to 3 months.
Air-fryer method:
You can put chicken breasts in the air fryer at 375°F (equivalent to 400°F), but you’ll want to check them for doneness at 12 minutes because they will cook faster, generally in 12-15 minutes if butterflied open. Cook to 165°F internal temperature.
Notes
Chicken is best cooked to temperature, not time. Always cook the chicken to an internal temperature of 165°F. This generally takes 20-25 minutes. If you don’t have an instant-read thermometer, cook until the center is opaque and the juices run clear.
I often bake chicken breasts at 375°F. All ovens are different. You can also raise the temperature to 400°F or 425°F for faster cooking and more browning. See what works best in your oven.
Nutrition
- Calories: 261 kcal per serving


